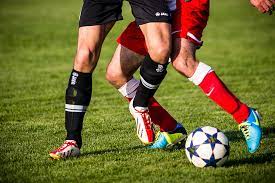
Picture yourself on the soccer field, making precise passes and swift maneuvers. Aside from your skills and the hours you spent on training, your soccer cleats are more than just a footwear – they’re your companions in conquering the game.
However, with all the cutting, pivoting, and sprinting involved in the beautiful game, it’s no surprise that your soccer shoes often bear the brunt of the action, leaving them scuffed, torn, or worn out.
Don’t worry, we’ve got your back! This comprehensive guide will walk you through the steps on how to fix soccer cleats. We would also like to include some tips and tricks on how to maintain and clean it for longevity and performance.
Step 1: Diagnose the Damage
Before we roll up our sleeves, let’s assess the situation. Take a close look at your soccer cleats – are the studs wobbling, stitching coming undone, or outsoles showing their age? Identifying the issues will help us tailor our repair strategy.
Studs Inspection
Start by examining the studs. Are they holding on or showing signs of detachment? Gently wiggle them – if they’re loose, they need your attention. Loose studs can throw off your balance, making it harder to pivot and sprint confidently.
Stitching Scrutiny
Next up, check the stitching. Run your fingers along the seams and edges. Are there any loose threads or gaps forming? Stitching keeps your cleats structurally sound, and even a small tear can lead to bigger problems if left untreated.
Outsole Overview
Now, give the outsoles a once-over. Are they as rugged as they used to be or showing signs of wear? Inspect the traction patterns – if they’re fading, your grip on the field might be compromised. Proper traction is your ticket to swift maneuvers and preventing accidental slips.
Upper Unveiling
Inspect the upper material, which encompasses the top and sides of your cleats. Is it torn, cracked, or peeling? The upper not only contributes to your cleats’ aesthetics but also shields your feet. Any damage here can impact your comfort and foot support.
Materials Check
Different materials require different care. Are your cleats made of leather, synthetic materials, or a combination? Understanding your cleats’ material makeup will guide you in choosing the right repair techniques and cleaning methods.
By meticulously examining each facet of your soccer cleats, you’ll gain insights into their condition and the specific repairs they need.
After finding out the issue, it’s time to do the real work of fixing your soccer cleats.
Step 2: Firm Up Loose Studs
Those wobbly studs can send your confidence on a roller coaster ride. Let’s tighten them up:
- Unscrew and Assess: Gently twist off the loose studs using a stud key or pliers. Examine the threads for any wear and tear.
- TLC for Threads: Brush away dirt and debris from both the studs and the stud holes. Clean threads ensure a snug fit.
- Threadlocker Magic: Apply a dab of threadlocker on the stud threads before screwing them back in. This superhero glue keeps studs steadfast during intense matches.
Step 3: Stitch up Ripped Stitches
When stitching takes a hit, it’s time to play repair wizard:
- Gather Your Tools: You’ll need a sturdy needle, strong thread, and a touch of determination.
- Align and Conquer: Line up the torn edges as if you’re solving a puzzle. Hold them steady with pliers for precision.
- The Stitching Ballet: Start sewing from the cleat’s inner side to hide the knot. Go for a whipstitch or backstitch for a fix that lasts.
- Stitch it Right: Tighten those stitches, ensuring a snug hug for the material.
- Knot and Seal: Knot that thread securely, trimming any extra length. Seal the deal with clear glue to prevent fraying.
Step 4: Resurrect Worn Outsoles
Traction trouble? Let’s salvage those outsoles:
- Clean Sweep: Brush off the debris clinging to the outsoles, creating a clean canvas for repair.
- Adhesive Power: Grab a trusty shoe adhesive and fortify the worn spots. Press firmly and let it dry as per the instructions.
- Grip Boost: For a traction upgrade, slap on adhesive grip enhancers. They’re like turbochargers for your cleats.
Step 5: Soccer Cleat Care 101
Remember, a little tender loving care goes a long way. If you want your soccer shoes to last long and to maintain its performance, then I suggest that you do the following:
- Post-Game Ritual: After each game or practice session, knock off excess dirt to keep your cleats primed.
- Gentle Cleanse: Bathe your cleats in a mild soapy solution. Spare them from harsh chemicals that can harm their essence.
- Air Embrace: Let your cleats bask in natural air. Avoid heat sources and direct sunlight – they’re cleat kryptonite.
Conclusion
Your soccer cleats deserve royal treatment, considering how they propel you to victory on the field. Armed with these repair and maintenance hacks, you’re not just extending their lifespan – you’re elevating your game. So, go ahead, fix that wobbly stud, mend those stitches, resurrect worn outsoles, and shower your soccer cleats with the care they deserve. After all, well-maintained cleats aren’t just gear; they’re your secret weapon to soccer glory.
Leave a Reply